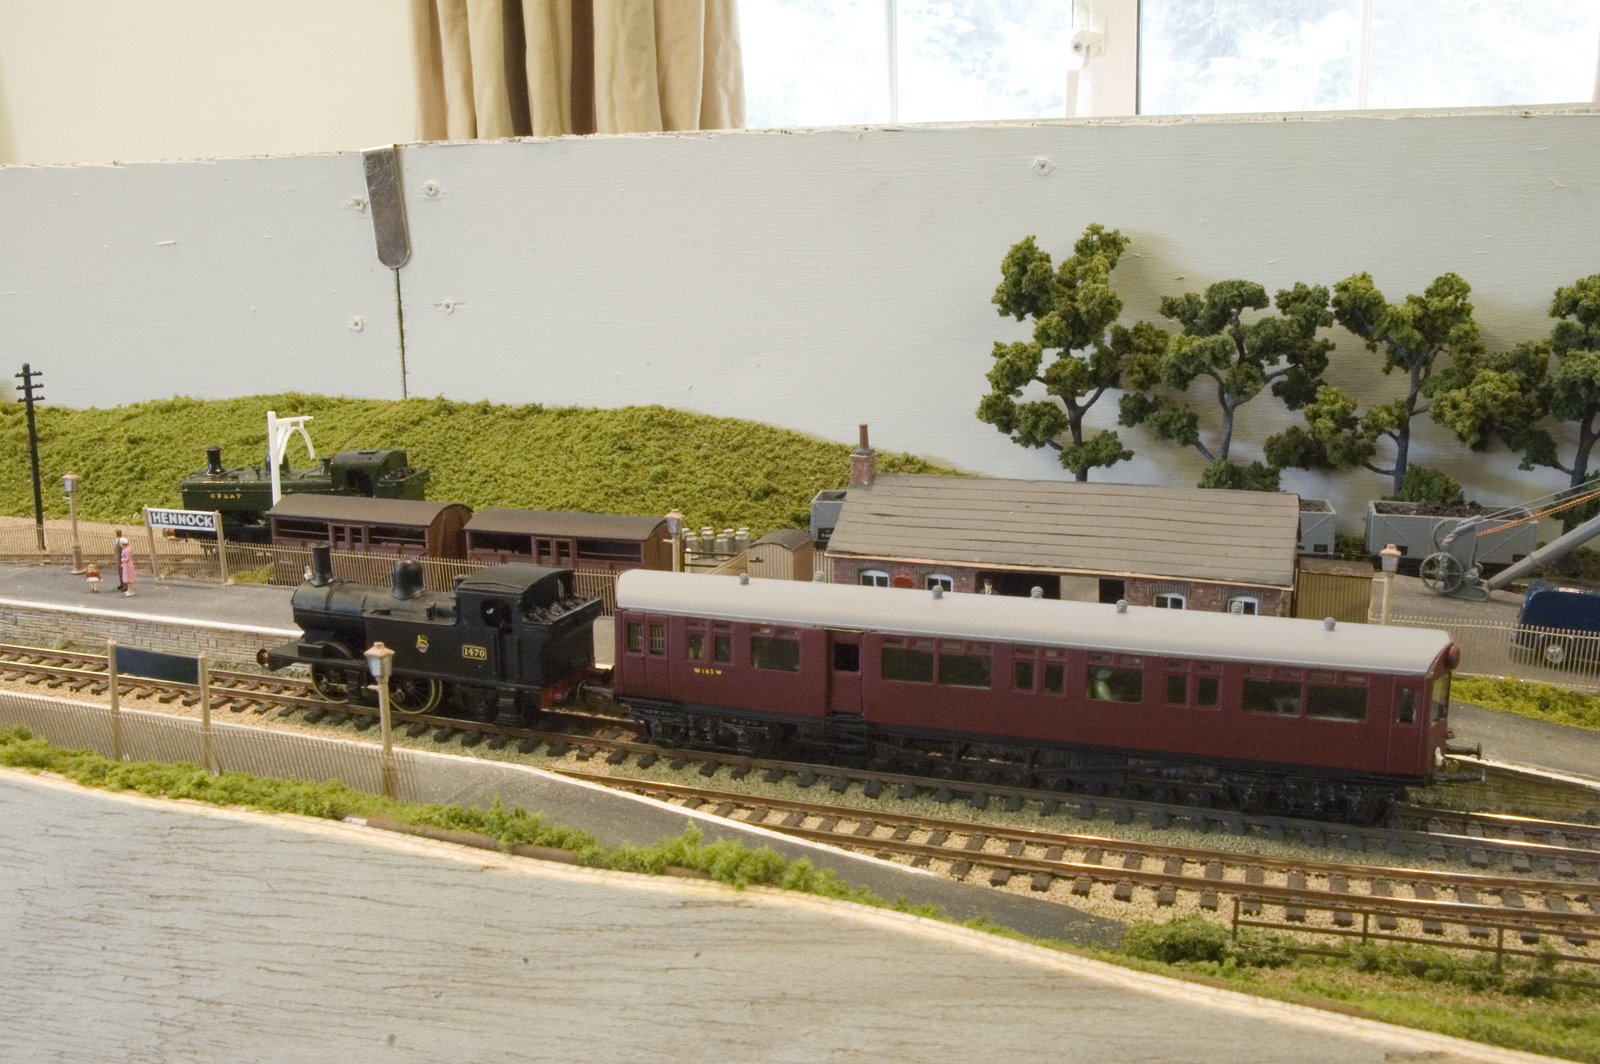
Hennock was inspired by my eldest daughter whilst sat on the platform of Staverton Station in Devon.
In an effort to get away from Ready to Run I chose 3mm scale to model this layout having previously exhibited a large Tri-ang TT layout. I hope the ramblings that all to frequently appear will be of use to you no matter what scale!
The track diagram shows a simple passing station with a couple of sidings. All track is PECO Hom-12mm gauge with turnouts operated by the wire in tube method. Control is provided by Gaugemaster HH with feedback.
Locos are mostly whitemetal kits running on etched chassis powered by Mashima 9/16 motors with Branchlines 40:1 gearboxes. Wheels are Markits with the latest 3mm Society products being introduced.
Coaches consist of Society 'B' Sets and coaches from etches by Worsley Works, Brynkits and 3SMR. A vast range of wagons are from the 3mm Society list with Finney and Smith providing the China Clay , Gunpowder and a few etched kits.
Hennock has appeared in Railway Modeller and Model Rail.
Please visit the links to the left - 3mm is the Premier Scale for modellers-

Hennock

Hennock
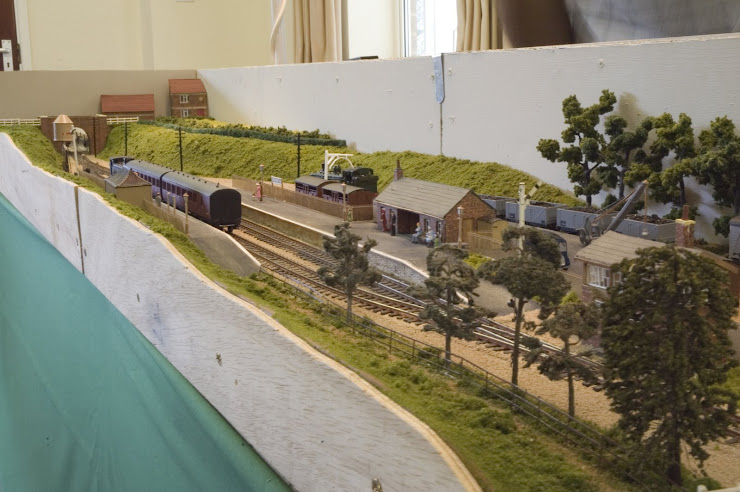
General view of Layout.The facia has since been varnished.

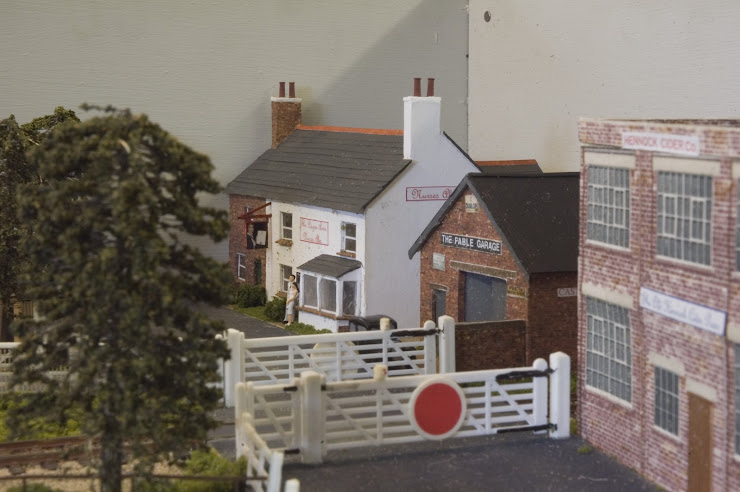
The Degree Inn

The Degree Inn
In recognition of my eldest Daughter's achievement. She is also the one who gave me the push to build the layout.

14XX and Autocoach

14XX and Autocoach
Shows Station building-based on Staverton.

Hennock Track Plan

Hennock Track Plan

Sunday, July 31, 2011

Finney & Smith GWR/BR Dia AA6 Permanent Way Brake Van


Exploded view of parts and where they fit
Instruction booklet

Sides and ends folded up

Etched chassis and ribbing for body

Whitemetal castings for springs, buffers and chimney

Etched W irons


This kit is supplied by Finney and Smith, see link , it is reduced to 3mm scale by arrangement with Jim McGeown of Connoisseur Models. It comes with a comprehensive set of instructions ,exploded diagrams and general tips on construction. Needed to complete are wheels and bearings,brass wire, couplings, paint and transfers and some material (suggest plasticard) for the roof.
The brass is extremely well etched and the definition is tremendous. As can be seen, I have started by separating the sides and ends from the main etch and forming these to shape.
The fold lines are well defined and bend to shape with the aid of, in my case, long nosed pliers with no serrations.
I have not pushed out the rivet detail as suggested so will have to live with this compromise.
Next to the works to apply solder  and hopefully remember to take pix as I go along.
I have some wide brass sheet which will probably be used for the roof, but that will be decided later.
I have not used separate W irons before so thats another learning curve to be mastered.
Friday, July 29, 2011

Tractor

At the risk of duplicating myself I am including a picture of the finished Tractor as shown some time ago.
This splendid shot by Geoff Halliwaell was taken at the recent 3mm Society AGM.
It really shows off my inadequcies at painting,by hand, small items. Mental note to get better!

Wednesday, July 27, 2011

Exhibitions

An update of forthcoming invitations has not been made for some time.
Hennock will be appearing at the following:-
Sept 3/4th-Andover MRE
Oct 29/30th-Weymouth MRE
2012
Jan 28/29th-Southampton MRE
March 10th-Swindon MRE

Monday, July 25, 2011

Bogies

 Back to the coaches- the CCU's have been built so its time to add a little relief to them.
These come in the shape of side frames and are cast white metal. These are for 7ft bogies and are for the coaches shown in earlier entries.
As seen in the top photo, these come as part of a complete white metal kit and so the mounting lugs must be removed so the faces are flat and clean. Then the axle boxes need opening out to  ensure that the pin-point bearings will fit snugly inside.Make sure that all faces are clean then apply Superglue to the bearing
and the sideframes, make sure the sideframe is
correctly positioned and apply pressure to cure glue-Simples!
One problem that I had not thought of was that of clearance of the bogies to the coach chassis-there isn't any! So the mounting plates will have to come off and a bit more clearance added to lower the mounting plate-Oh well !

Sunday, July 24, 2011

Back Again

Just had the repaired computer returned to me. That a £20 part can cause so much disruption is beyond comprehension. Two exhibition invites were recieved during this time. Two job applications that have timed out because all the info was-yes you'r ahead of me- was on the computer!
However, I have not been idle. This little van-started life as one of the GPO's finest , took about an hour or so to clean up and build. Painted and a windscreen fitted then the roof saw another addition to the Hennock vehicle stable.

Sunday, July 17, 2011

Coaches

The next thing to be added are the transfers-personally a job that is not my favourite. However, it's got to be done so firstly, which ones are we going to use?
Looking through my box  I found some 4mm HMRS GWR lining Sheet 8. This I used for some Bulleid locos I repainted some time ago and are the easiest available to apply in my opinion. The coach lining is very fine and will pass for what I want.
A new blade in the scalpel and the lining is cut, not through the backing just enough to peel it away, as close to the lining as possible. Then apply to the side, it is a bonus that the paint used is a good gloss, it is so much easier to put on rather than semi gloss. When satisfied that the line is straight press down and then (purists look away now) I lick the entire length pushing it down as I go. So much easier and quicker than   prompting into place with a paintbrush.
The numbering is from 3SMR Sheet 3401, BR(W) coach  transfers. There are numerous sets of numbers and I cheat by using parts to make up the numbers I need. Downside is that they should be yellow but that can be partly rectified by passing a yellow felt tip over them later-maybe.I have put small pics up today, partly because larger images didn't look too good lager than the model.
Once dried fully, the paint can be touched up where necessary-Large pictures are useful for that-shows the smallest blemish! Then I will decide how far I go with fittings.

Saturday, July 16, 2011

Platform Edging

 Whilst waiting for the paint to harden I tuned my attention to the platform sides needed for Teignford.
As on 'Hennock' I am going to use the Peco 'N' Gauge stone platform edges. I use the 'N' Gauge version as they seem realistic, and by standing then on mounting card come to an exact 3ft from the rail surface.These have proved successful so I have undercoated about 20 of them, and then had a play with some axcrylic paint picked up cheaply in my favourite Discount Shop.
A darker shade of grey was drybrushes on so that the stones are a darker colour. Then some of the individual stones were picked out in a lighter shade of grey and a medium brown.
The white of the platform edges neede a couple of coats, the white used is Model Colour by Vallejo, a product I was introduced to by our local weathering expert who will, incidentall, be at Westfest  in September.

Friday, July 15, 2011

Main Colour Applied

 The main colour has been applied to the three etched brass coaches being made.
I have been lazy and used spray cans for the main colour, Hycote Ford Cardinal Red in this case. There are many discussion sites which have debated the use of car colours for use when painting. The advantage is that with a small number of items to spray, it is often quicker to use and no cleaning of airbrushes etc.
These have been given two light coats and the colour build is quite good.
The thing with many light coats is that surface detail is still retained, in tis case the etched marks for the door handles, grabs and end handrails is there to aid their fitting later.
Leave to dry for a couple of days before attempting any further work, yes- I know its tempting but a little restraint is needed, it will pay dividends in the long run.
Roof vents , toilet tank hatches and strips where joins in the roofing material has been made, these are strips of sticky labels simply stuck on. The paint will seal these.
So the chassis frames for the two 57 footers have been made, the 60 foot chassis is next.

The ends to be painted black and the roofs grey and then transfers can be fixed into place, a fiddly job trying to get them in line between the door handles and grabs.

Thursday, July 14, 2011

Bogie Bolster Wagons

 Tri-ang made a few items that can be used on 'Hennock'. One of these, T174, is the Bogie Bolster Wagon. Dimensionally it is pretty accurate but there is also a downside.
The moulded planks are from end to end whereas they should be across the wagon. The bogies also need changing and this is where a little bit of luck came in. I happened to buy some bogie that are made for South African Prototype Railways. The gauge is 12mm and of the five that I bought, three were ready made and two are kits.These are fairly close to the type fitted to these wagons and also saved a lot of time and money purchasing the correct ones.
I have seen CMD Models website but it is a little vague on availability, indeed another 3mm member has tried to aquire them previously.
However, back to the BB. Its just a matter of removing the original bogies and substituting the CMD ones, paint the wagon, apply transfers-from the old Woodhead sheet- varnish and apply couplings (which need to be blackened) and there we are-another addition to the wagon rosta.

Wednesday, July 13, 2011

Tools.

Just a quick note today. The items pictured are one of my most used tools. I have several Pin vices,in varying sizes as seen. The smaller ones I use for drills of .3mm plus. The double ended vices can take drill bits up to about 2mm .
Most useful for getting the holes in the right place as well as keeping them safe. Small drills are prone to breakage if you are too aggressive with them and don't use any lubricant, I use good old fashioned spit!

Tuesday, July 12, 2011

Coaches Progress.

 Once the roofs have been attached, Evo-Stick used wet in this case, and the glue dried for a couple of days the marking out can begin.
I have some drawings that were published in the Model Railway Constructor but unfortunately I they aren't dated. J.H.Russells books on Great Western Coaches are a font of information and invaluable for constructing these coaches. The details on bogie wheelbases and numbering sequences save an awful lot of research and are well worth the price.
Between these published details the positioning of
roof vents etc are made so much easier.
Seen in the poorly focused lower picture is the footsteps soldered into position. Alan at Worsley Works ha sproduced some fine etches for these, no cleaning up at all was needed, they just slotted into place. If only everything was this easy!

Monday, July 11, 2011

Mixed Traffic-184 July 2011


The latest edition of the 3mm Societies journal hit the floor with a resounding crash this morning. Together with the 3monthly newsletter it keeps far, and not so far, flung members in touch with all thats happening in the world of 3mm.
So lets see whats included this quarter.
1.Report of the AGM together with details and photos of the resulting prize winners.
2. Article on Nick Salzmans excellent Yeoton Wharf-Broad and Narrow mixed gauge.(This layout will be appearing at Westfest in September).
3.Notes on creating a modular layout by Mervyn Turvey.
4 Rod Shaw building signals from kits.
4.Excellent photos from the AGM.
5.Modifications to a controller.
6Another shot from Eric Brutons photo album.
7.Usual Q&A, Blastpipe letters and bits and pieces complete another excellent offering from editor John Sutton and Newsletters John Walker.


Couldn't resist including this excellent photo of Howard Love's prize winning Barn scene-a superb piece of modelling which really looks better in the flesh.
Whats New details Fencehouses new chassis for the Tr-ang  TT Grain wagon.Also, Brynkits GWR Toad Brake Van Handrails are described. This etch I aquired from Brian a short while ago ,just after fitting plastic rod ones to my two newly built vans. However, they will be attached to the original fitted Van I made some time ago.

Sunday, July 10, 2011

Cleaning up

After all that soldering we need to clean up the areas that have come into contact with flux. Not only the Fluxite that I use as an extra, but also that contained in Multicore solder. I use Fluxite because it aids soldering and I like to align the joint and add the solder from the hot tip of the iron, not applying the multicore and relying on its own flux.
When all this is done and its cooled down the cleaning begins. I use Shiny Sinks, obtained from my local Discount Store, InExcess, a slightly abrasive liquid, if its good enough for a stainless steel sink-then its good enough for me!. It cleans and leaves the surface ready for undercoating.
Rinse well and the surface is bright and free of any flux residue. Blot with kitchen roll and leave in a warm place for a short while and its ready for adding those last minute detailing parts.
I have a supply of old toothbrushes for getting to those difficult to access places, good excuse for a new brush for what its intended.

Saturday, July 09, 2011

GWR Loriot M


Having made most of the plastic kits I have in the tuit box, now is the time to
turn attention to some brass kits that I have put off making for too long.
This example is a Finney and Smith offering by arrangement with Jim McGeown of Connisseur Models. Reduced from a larger scale this kit has been beautifully etched in brass. A GWR Loriot M Dia. G14 Machinery Wagon.
The kit consists of an etched sheet needing wire, 8mm disc wheels,couplings and paint and transfers to complete. A comprehensive guide to assembling brass kits is part of the package together with an assembly order list.
Etch lines are crisp and the only worrying aspect is when the wheel bearing holes are opened out,however, there is just enough to mount them in.
The main body has been soldered together which was fairly uneventful, the brake levers still have to be attached but the bracing will be superglued into position.
One thing to remember is to clean any flux off the model after each session, this prevents any attacking of the brass at a later date.
All in all a few hors well spent and all the time my soldering skills are improving. However, I cannot hold parts together too well, shaky hand syndrome, so thought has to be given to jigs to steady whilst soldering.
The coaches are coming on, need to get some corridor connectors from the Society Shop soon to enable me to complete before spraying.

Friday, July 08, 2011

MJT Coach Bogies

 The component parts have been removed from the etching. The half frame on the right has been folded up and the corners lightly tacked.The left hand one has had the pinpoint bearings soldered in . The pivots are made up of snap fasteners and have been affixed to the pivots.
The wire that provides the springing effect has been passed through the mounting points rady to be soldered in when the bearings have been fitted to the right hand frame.

The completed bogie with wheels in place and the wire soldered to both frames. This provides springing as well as the width of the frames to hold the wheels and ensure free running.
The completed bogie from the side showing the pivot plates attached ready to be fitted to the coach chassis. The dust needs to be removed from the wheels and the sideframes fitted and painted before that but what an easy way to construct coach bogies ensuring that all wheels are on the track at all times.

Thursday, July 07, 2011

Coach Bogies

 Two types of Coach bogie frames are available to the 3mm modeller. The top picture shows a flexible type supplied by the Society, these are made by MJT and mirror those produced by them in other scales. Pin point bearings need soldering in before assembly starts. Supplied with wire and press studs for mounting they are easy to make in an evening and then just need the sideframes attached.


The lower image shows the type supplied by 3SMR and are again a simple fold up type but with no form of compensation. They are also a little scant on the width side ,I get over this by using old Society wheels that ride in the frame rather than have pin point bearings added. Quick to make, these I mount to the chassis with nut and bolt rather than press stud. The other upside of this type is that the couplings can be attached to the frame whereas the compensated type needs a braket made up to accomodate the coupling.

Wednesday, July 06, 2011

Ex GWR coaches

 I bought thes sides from another 3mm member , they are, I believe, made by Comet, they have some of the droplights in semi open positions which saves an awful lot of work .The downside was that the tumblehomes had not been formed. The brass is thickerv than that used today for 3mm coaches and was a challenge to form.
A corridor brake and a corridor third are the subjects. Again the ends are made up with the retaining nut soldered to the mounting plate before that is attached to the coach end. The steps are folded up and slid through the ready made slots and tacked into place, some excellent etching! The sides are then squarely attached to the assembled ends and checked to make sure all is square.Next the roof needs cutting to length, filing to the inner profile and vent holes drilled .

Seen here is the chassis for one of these coaches, the buffer beams are in place and just need the holes for the bogies to be drilled and the trusses folded up and they are ready for the paintshop.

Tuesday, July 05, 2011

Pullman-Etched Brass Kit

Started to assemble the sides to the vestibule ends previously seen. Its really a matter of getting the sides square to the ends and soldering into place. I run a fine line of flux along the joint and add solder rather than try adding multicore . I find it easier and there is no need for a third hand. Then the chassis is made.
The chassis comes in an etch with the main floor, which have wings which fold up to hold the body square. The solebars are folded up and added to the floor, I use a strip of hardwood with square edges to fold and to hold for soldering . The underside is
seen here with the screws holding the body in place.Next is to find the centre of the chassis in order to find the position for the bogies. Helpfully the side to side centre is already marked aiding positioning. Once these are marked and drilled the truss bars can be folded down and a fillet of solder added for strength and keep them in place. The roof will be a challenge as the ends are domed and the vestibule has a different radius.


Monday, July 04, 2011

3mm Society Display Board

Everyone needs publicity. How many times do we visit an exhibition , look at all the layouts, and ignore the many society information stations? I know I have. That is to my detriment. All railway modelling is roughly the same. We all strive to produce a layout which is as close as we each can come to our own desires.
Most if not all modelling techniques are relevant to all scales, you just need a bigger baseboard or soldering iron to achieve these aims. Many times we have been told that 3mm is an ideal scale-it is- but the next statement is-'A pity no one makes it anymore' or 'Is there any ready to run?' Most are amazed by the amount of products available, I usually carry a file with lists of whats on offer. Plus there is an area group not too far away whose advice and help is freely given.
Thats why I and my fellow 3millers do it! Incorporated within 3mm is a multitude of gauges but we all have a common interest-3mm :ft.
I adopted 3mm because I grew tired of building 4mm layouts, with scratch built scenics, for the questions as to who made that loco, coach,wagon et al.
I get a satisfaction that it runs because I made it, its unique and I am modelling in the best scale.

Sunday, July 03, 2011

An exhibition of ourselves!

Just looking through some old files and came across this! We were invited to show 'Hennock' at Yeovilton and I can honestly say that the location was one of the best for a nostalgia kick one could ever get. Not perhaps the best of shows, but, right next to Concorde! Location, Location, Location!

Saturday, July 02, 2011

Hymek

 After a raft of wagons and road vehicles its time to turn to the Hymek kit. Cast by Bruce Smetham, it was my intention to build the £mm Society chassis for this. However I have looked at the etching and bits for this kit and have decided to take the easy way out and fit a Halling Motor Bogie.
These excellent little mechanisms are designed to power Trams. They are adjustable as well, so this will just about do for the Hymek.
A while was spent cleaning out the window aperatures and cleaning up the base of the body.
A quick coat of primer lets us see the bits that need
a bit more work.
The marking for handrails has already been done so its just a matter of drilling out the holes.
This is my first Diesel in 3mm so it will be a steep learning curve to hopefully make it ride correctly.

Friday, July 01, 2011

Morris Commercial


ThisWorsley Works kit takes just a few minutes to make. Five pieces are needed to assemble what you see here plus a roof. Assembled with Superglue, cleaned off with the fibreglass brush and a quick undercoat followed shortly by the main colour. All thats needed now is for the mudguards and grille to be picked out and the chassis painted . Then its ready to be glazed and wheels put on. A quick evenings work.