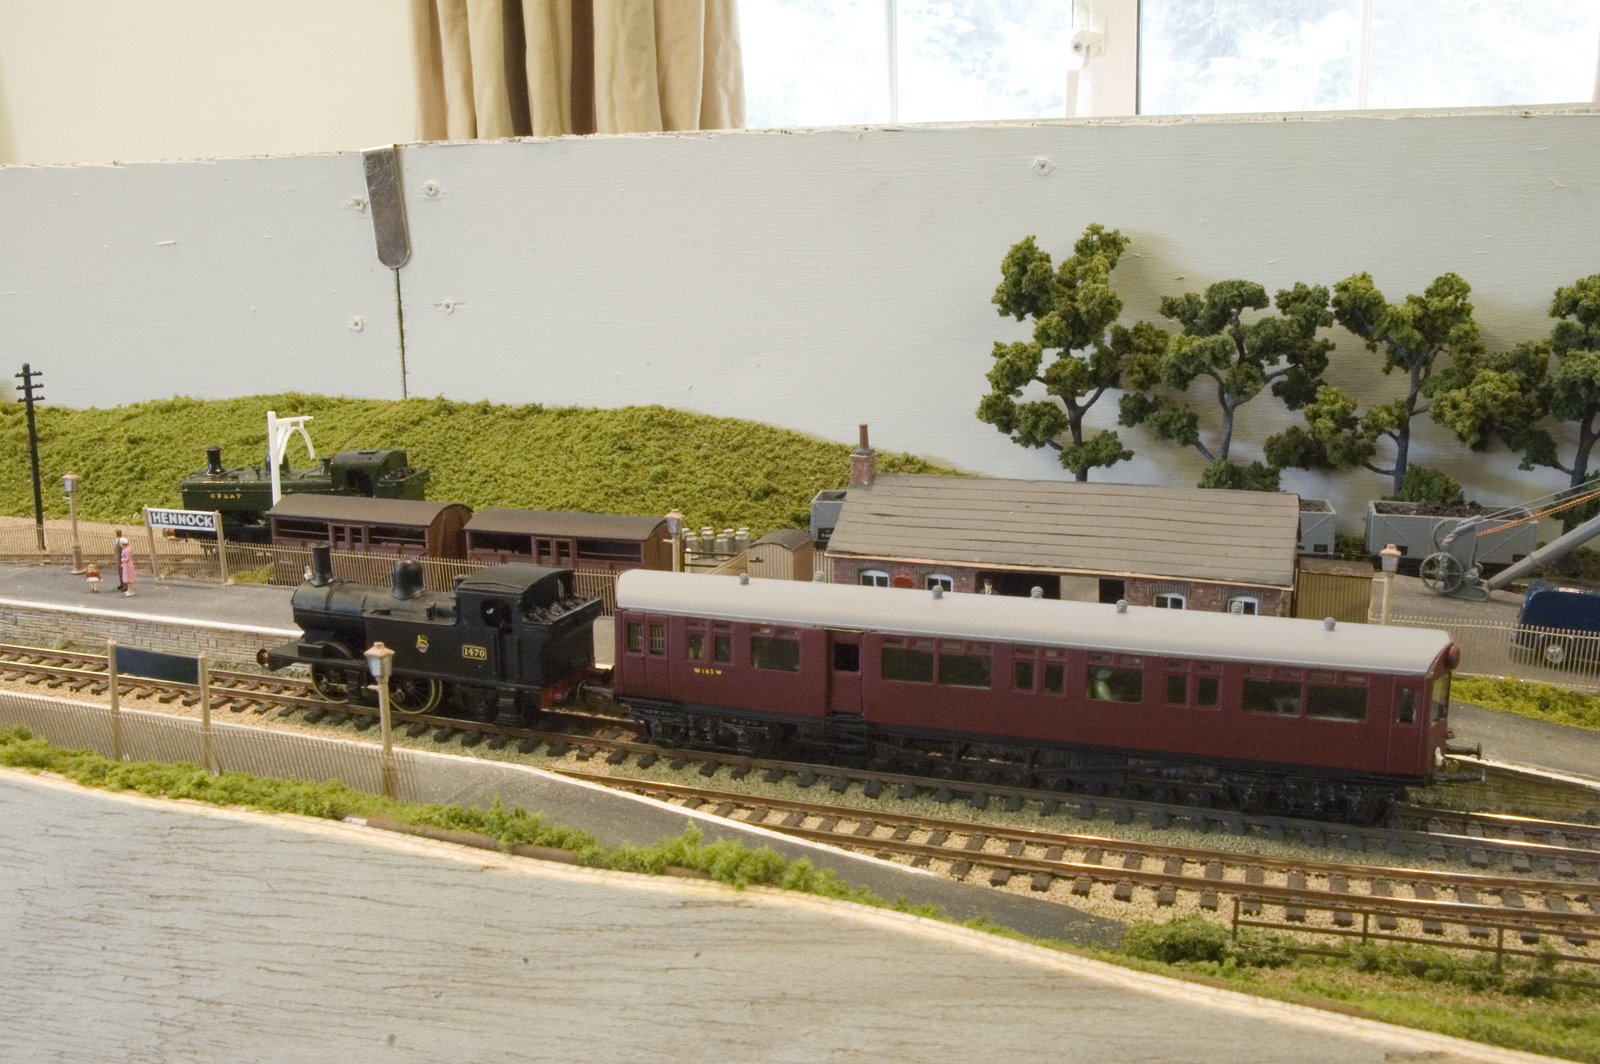
Hennock was inspired by my eldest daughter whilst sat on the platform of Staverton Station in Devon.
In an effort to get away from Ready to Run I chose 3mm scale to model this layout having previously exhibited a large Tri-ang TT layout. I hope the ramblings that all to frequently appear will be of use to you no matter what scale!
The track diagram shows a simple passing station with a couple of sidings. All track is PECO Hom-12mm gauge with turnouts operated by the wire in tube method. Control is provided by Gaugemaster HH with feedback.
Locos are mostly whitemetal kits running on etched chassis powered by Mashima 9/16 motors with Branchlines 40:1 gearboxes. Wheels are Markits with the latest 3mm Society products being introduced.
Coaches consist of Society 'B' Sets and coaches from etches by Worsley Works, Brynkits and 3SMR. A vast range of wagons are from the 3mm Society list with Finney and Smith providing the China Clay , Gunpowder and a few etched kits.
Hennock has appeared in Railway Modeller and Model Rail.
Please visit the links to the left - 3mm is the Premier Scale for modellers-

Hennock

Hennock
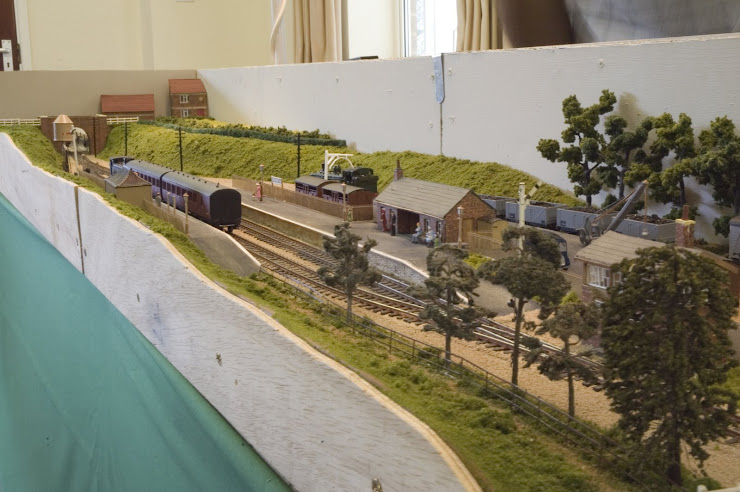
General view of Layout.The facia has since been varnished.

The Degree Inn

The Degree Inn
In recognition of my eldest Daughter's achievement. She is also the one who gave me the push to build the layout.

14XX and Autocoach

14XX and Autocoach
Shows Station building-based on Staverton.

Hennock Track Plan

Hennock Track Plan

Wednesday, October 31, 2012

Grounded Van Body.


Lack of time has precluded me from furthering this piece of scenery.
Weathered with the materials used at our Weathering tuition by Tom Rayer, the area needs a lot more clutter.
Because of impending exhibitions it has only been possible to locate the van body, this is mounted on coffee shop stirring sticks suitably narrowed to look a little more believable.
Sorry about the poor enlargement- done in haste before storing Hennock.
Work on Teignford is continuing with the possibility of using the N gauge signals introduced by Dapol recently. I have purchased one and am looking at the siting at the platform end- and no I don't thing Hennock will be having one of these, too much remedial work would be needed.
Tuesday, October 30, 2012

Railex Taunton 2012.

 An excellent weekend was had at the Somerset Railway Modellers Railex.
Started from home in the early hours we arrived after 8 o'clock and set up quickly. Testing the layout took but a few minutes-all down to the prep done the previous week. Off to the restaurant for a bacon bap which saw us set up for the day.
The Saturday passed very swiftly- the mark of a good show. Thanks to those who stopped by to say hello and discuss 3mm.
The accommodation was first class and only a short walk into Taunton saw us comfortably ensconced
 in armchairs with a decent beer.
Sunday dawned with a full English Breakfast and another busy day. At on point it was like a 3mm Society meeting with many members having made the effort to attend.
I must compliment the organisers for the catering-home made Steak & Kidney pie on the Saturday and a full Beef roast on Sunday.
Packing up was done in minimal time and the homeward journey made in pouring rain. Still we were home bymid evening- just got to get it all out of the car and stored .
Ther was some layouts I had not seen before- several pictures of Kingswear in 2mm and one of Bodmin -it is hard to think that Bodmin is 40 odd years old but still looks good, a credit to the builders.


Monday, October 29, 2012

Worsley Works 04 Class 0-6-0 Diesel Shunter.


To start off the chassis was removed from the fret and any pips filed flat.
Then it is a matter of opening out the holes to take the axle bushes. This can be done in a couple of ways. Using a broach or turning a round file anti-clockwise or if you prefer it the other way to the cutting edge. Both will achieve the objective of a sliding fitting bush with no slop. Care is the essence here as is patience- it can make or break a well aligned chassis!
The lower picture shows the bushes soldered into place- you can superglue them, it's not my way however. Then a quick clean up of the axle hole to make sure that the axle is a smooth sliding fit- I use a broach for this- you can use a rolled up piece of wet & dry paper.  Next the chassis is folded up and when square a fillet of solder is run at the folds.A piece of  2mm silver steel bar  shows that all is square and the axle holes in line. This chassis takes 2mm axles-not the more usual 1/8th inch Romfords or Society products. The reason for this is that the wheels have 2mm holes in them with plastic centres so a lot of care is needed.

Sunday, October 28, 2012

Grounded Van Body.

I have been thinking about the vacant expanse of land around the trees. It is a void that should really have some purpose.
Having a clean up I discovered this van kit . I think it has its origins with George Mitcheson being just two sides and ends.
Some stirring sticks from Costabucks (like that one!) were roughly cut and superglued under the floor. A piece of plastic venetian blind fitted as a roof and a quick coat of primer see's this result.
A blank canvass to experiment on and hopefully add a bit of character to it's intended position.

Saturday, October 27, 2012

Storage and Transport.


With quite a few pieces of stock for the two layouts, it's not always possible to accomodate them all when operating at home.
So the way they are all stored is in ex-cutlery canteens. One of my sisters ex-boyfriends years ago was a chef. He had new cutlery for the restaurant and was going to bin these. All that needed doing was to remove the cutlery storage and replace with soft skinned foam rubber.Foam is used in strips to prevent damage to the roofs.
 Being all the same size they are easy to store and transport. Another piece of luck was some redundant venetian blind slats, cut to length and used to separate. Thanks Dave!

Friday, October 26, 2012

Ex GWR Mogul 7316 Finished.

 After a couple of years, maybe more, the Mogul is finally complete.
The finish is in unlined black as per the photo of the real thing.
Real coal in the tender and a piece of black plasticard as a fall plate really gives life.
The numberplates are again the 3mm Society numberplate kit, this time lined up through my light magnifier. These really come into their own when trying to get things lined up which, when left to my ageing eyes,aren't always correctly aligned.
With the chassis run in another loco for Hennock and more often for Teignford.
Hennock and the Mogul will be at Railex-Taunton 27th & 28th October -Tomorrow!

Thursday, October 25, 2012

Narrow Gauge in 3mm.

 More of Daves stock which has mainly been built from brass etches or as Allan of Worsley Works puts it 'Scratch Aid'.
The Donegall railcar is articulated and powered by an N gauge mechanism, a diesel motor bogie.
Worsley Works have quite a selection of Irish Narrow Gauge kits from several railway companies.
It is well worth while to give the list a visit as it is surprising the range and number of scales represented.
 http://www.worsleyworks.co.uk/


Wednesday, October 24, 2012

Kitmaster Mk 1 Coaches

The two brakes, the ones that I have all the parts for have been sprayed in BR Maroon- actually Vauxhall Cardinal Red (but don't tell anyone!).
Once dry, the chassis is brush painted with Coal Black enamel- Precision Paint.
Once dry the job of lining and lettering rear their ugly heads- lining is one of my least favourite past-times.
Still has to be done so must find the sheets of lining transfers that I know I have somewhere.

Tuesday, October 23, 2012

Ex GWR 2-6-0 Mogul

At last in colour albeit black. The Mogul is running under her own power for the first time.
The body has been sprayed black as this one will be unlined black  7316- from a picture in a Bradford Barton book
Many things still to do- too many to list here!
The chassis runs well under the body but a couple of shorts occur at various points (no pun intended!).
So out with the file to pare down the cylinders slightly, tighten up the pony truck as it has too much front to back movement. The front frames needed the most drastic action as the pony wheels touched them each time a curve was encountered.
So-time to paint the chassis, add coal to the tender and loads more before 7316 is ready for display.

Monday, October 22, 2012

Preparation for the Exhibition Season.

Hennock will be running at Railex Taunton on the 27th/28th October 2012. For directions and the rest of the line up see-www.somersetrmc.org.net

We have reached the time of year when the exhibition season really kicks in. Over the last couple of shows several things have been experienced which really needed something doing.
There are a few areas of grass that need a bit of touching up, so PVA was brushed on to the affected areas and Woodland Scenics rough grass was carefully applied. After letting dry, the overspill was removed with a soft brush.
The fiddle yard was next to be repaired. There had been a few episodes where current wasn't being transfered through the Bulldog connection. This turned out to be a build up of aluminium oxide which prevented conductivity being transferred from the rail to the clip. The answer to this was to remove the offending screws, clean all surfaces with a fibreglass brush and reassemble using a shakeproof washer which bites into the aluminium surface. Fresh solder and an ohm meter confirmed that power was where it should be. I also took some time in checking all the soldered joints where the track crossed baseboard joins, this was just as well as I found one in the goods yard. This showed up because the Mogul was being tested and the tender occasionally derailed on this join.
The connecting posts and soldered joints have been repaired.
All locos have been test run and serviced, then checked that they would traverse all running  tracks and work with the uncouplers. It is not just the exhibition itself but there is a lot of work behind the scenes to make sure that as little goes wrong as possible.After all the viewers don't pay to watch your lack of preparation!

Hennock nearly devoid of stock and cleaned ready for it's next outing. More about the Mogul at the platform another time.

Sunday, October 21, 2012

Ex-GWR 2-6-0 Mogul.

 The ex-GWR Mogul has been neglected and really needed finishing.
I have a bit of a blank when it comes to cylinders and motion-must be all those Panniers! Help was at hand however. Nigel kindly fitted the cylinders and slide bars to the chassis I had made and a very good job he has done.
The cylinders had to be widened to allow some front axle lateral movement and the front of the frames had to be removed to allow the pony truck to swing.
The frames can be replaced with plastic card and will hardly be noticeable when on the track. Oh-and the wiring needed reverse fitting on the motor so now it goes the same direction as the others!
I also notice that the latest edition of British Railway Modelling has a 3mm layout included-Cadeveton by Gwyn and John Williams. A bumper year for the Premier Scale!

Saturday, October 20, 2012

Dorset Modellers.

Dave has been creating his Irish narrow gauge layout in 3mm for a while.Based in Southern Ireland to 3ft gauge he is using N gauge mechanisms for power as this matches perfectly the 9mm gauge track.
To show that we have broad interests, here is one of his coaches on a turnout made by Robert Rhodes.This is to O gauge and shows the difference in size but the construction methods, no matter what scale are the same.

Friday, October 19, 2012

St. Agnes in 3mm

 Nigel Cullimore has been building St. Agnes for a while. It started off as a continuous circuit on one board with a centre operation cut out.
However, Nigel found the curves too extreme and operationally he wasn't satisfied. So the layout has become an end to end with two fiddle yards.
Richard Pope has been most helpful in supplying many photos and details to enable a faithful replica of the station to be built.
There are compromises but arn't most model railways? The layout is instantly recognisable as its contemporary and is progressing well.


Thursday, October 18, 2012

Dapol N Gauge Signals.

 First chance to see one of these as produced by Dapol.
It seems to scale out at about 18ft in height in 3mm-and works by simple flick switch. The lamp even works!
Nigel spent most of the October meeting playing and it seems about right for a 3mm layout- there are plans afoot to add this one to Nigel's layout St Leven which will be at the Poole MRE in November.
At a little over £20 locally, you would be hard pressed to make signals for that !


Wednesday, October 17, 2012

Bogie Side Frames.

These bogie side frames are the 3mm Society CBR126 and come in two pieces. Holes have to opened up as shown by the drill bit in the R/H picture- these accomodate the uprights on the centre springs. The axle spacings are marked and need opening up- I did it in a couple of stages but still managed to drill through the axle boxes! Then its a matter of glueing them onto the bogie frame- I did have to choose the one that I mucked the holes up on for the photo-Ah well you get the idea I hope.


Tuesday, October 16, 2012

3MM Irish Narrow Gauge.

Dave has found a use for the motor from his central heating system!
He has been trying to make a motorised turntable for his layout but the 6volt motor and gearbox he used didn't cut the mustard.
So when the central heating went on the blink he used the 12 volt motor that was replaced and now the turntable is very smooth and very controlable- next for stop points!

Monday, October 15, 2012

Brynkits Bogie Frames.


 At Westfest 2012 I bought a couple of packets of Brians latest Coach Bogie Frames.
These- Kit 3CB.255- are etched brass and come complete with brass pinpoint bearings.
Some of an unknown parentage that I had previously used were prone to splying outwards once the wheels were fitted, due I would think to the frame not being wide enough.
The bearings are easily soldered into place with no work needed. Then simply fold up, soldering at joints as you go adding wheels before the final side is secured- Recommended and the easiest to make so far!


Sunday, October 14, 2012

Mixed Traffic October 2012.

The latest Mixed Traffic is to hand-together with the Newsletter. Excellent cover photo of Stephen Moor's BR Standard 5MT 4-6-0 73117 'Vivien' which was the Tony Birch Memorial Award runner-up at the May AGM.
A diverse range of articles this quarter from Wim Harthoorn's Bangcock Station Canopy jig through Concrete footbridge mods, Replacement coupling rods and reminiscences of 50 years 3mm modelling.
Add to this the Bits and Pieces, Blastpipe and Q&A and it is another feather in JS's cap.
There is also a thought provoking piece by Wim on the pro's and con's of DC or DCC and advice recieved to form an opinion.

Saturday, October 13, 2012

Kitmaster Mark 1 BSK

 Things have moved on somewhat. The body has been rubbed down and a coat of primer applied.
The finish is remarkably smooth with little evidence of the surgery performed.
The Kitmaster moulding for the underfame has been glued into position- I had contemplated using a Brynkits replacement but, as the ones with the kit were Ok I saved a little money. The only thing needed was to open out the location holes slightly to fit.
I have removed the plastic battery boxes and replaced them with the Society casting CBR146, although these didn't have brackets, both superglued into place
The Corridor Connections are Society CBR189, a
 whitemetal casting to replace the original plastic.
 The strip of steel to provide weight was glued into position using the original locating pins supplied with the kit. Much needed weight is just in the right place.
As can be seen- the workplace is starting to get a bit messy and due for a tidy but at least everything is to hand and I can find it!
One thing I'm not looking forward to is painting the raised lines on all those windows although the comps will be worse! And undercoat first!!

Friday, October 12, 2012

All Loaded and ready to go!

 Sheer indulgence i'm afraid today.
Having put these two models together, I came across some chain given to me some time ago by Peter Bossum. This is ostensibly for attaching containers to Conflats- of which more later.
The first thing was to attach some chain to the steering gear of the 'Roller-see lower photo.
Thinking it would be a good idea to chain the Aveling and Porter 'Roller to the Lowmac, I was then faced with how to do it. The answer was to thread some fine wire through the end links and pass them through the chain holes on the Lowmac. The wire was then twisted to hold the chain, threaded through the 'Rollers wheels and secured on the opposite side in the same way. Still with me?
This gave attachment but it wasn't tight or rigid. The solution? Good old Superglue- other glues are available-but don't work so well. So the whole lot is now a solid mass and I think look rather good together.

Thursday, October 11, 2012

Kitmaster Mark 1 Coaches.

 Last September I posted about building some of these elderly kits. Having exhausted my pile of wagons, I now turn my attention to these. I have seven sets of sides which will comprise  three Corridor Brake Seconds (BSK), two Corridor Composites (CK) and two Corridor Seconds (SK). Together with  a lot of photos, plans and a trusty copy of British Railways Coaches from Ian Allan ABC series (Third Edition January 1962) hopefully I can turn this assortment into something akin to the real thing. First I must list exactly what I have. This is an assortment of original kits, 3mm Society shop bits and the new etchings available from Brian at Brynkits.
The first coach, a Brake Second, has had the raised lines removed from the sides and rubbed down with some very fine wet and dry paper. It looks a bit of a mess but once cleaned off and primed, it will give a better idea on how well this butchery has paid off. One thing I may change on subsequent kits is to detail and paint the sides before fixing to the chassis and ends. One thing immediately obvious is that I should have removed the moulded battery boxes and brake hangers before glueing it all together. Ah well, hindsight is a great thing!

Wednesday, October 10, 2012

Aveling and Porter Steamroller

Quite chuffed with this. After spending a short time building this small whitemetal kit,all stuck together with superglue, it was ready for painting.
First a good clean with Shiny Sinks and left to thoroughly dry and then a couple of thin coats of Holts grey primer.
The green is Humbrol No 3 and the black is Matt acrylic.
The wheels and roller were left in grey primer as this seems to give the best effect.
All thats needed is some very fine chain for the steering gear and it will be securely fixed to the Lowmac.
By the way- Dorset Group Meeting this Saturday-13th October  2012 at Avon Causeway, 

Tuesday, October 09, 2012

Southern Pill Box Brake Van.

This Brake Van caused me some problems when it was found that the baseplate had warped. The Cambrian mouldings are excellent however and I think the time spent getting it straightened out was worth it.This was achieved by clamping the chassis side to the base while the solvent hardened.
I cheated slightly in that I didn't fit separated handrails this time, just Meked some thin plastic rod where the handrails should go. I think this has turned out as acceptable- it also saved an awful lot of time. I still took an age to paint them as the old hand is not as steady as it used to be.
I nearly beat Bachmann to the release of this model!

Monday, October 08, 2012

Palvan.

 The Palvan kit is slightly different from the usual kits. It has cast whitemetal axle boxes and springs . The casting is attached in the same way as the normal plastic moulding, all thats needed is for a quick clean up and a dry run to make sure that there is a good fit. As can just be seen, the V hanger has been opened up to allow a thin piece of brass rod attached to the brake lever can be fitted.
The finished van is shown below- roll on the West Byfleet meeting as my kit drawer is almost empty.

Sunday, October 07, 2012

Finney and Smith Loriot M

 The Lowmac has been through the paintshop and the tedious task of applying transfers has arrived. The wagon depicts an unfitted type and this means that the white lettering has to be on a black background. The backing transfer was applied, using acrylic matt varnish as an aide due to the lack of stick on  my ageing transfers. These were then left for a day and then the lettering applied. An extremely fiddly job- the result in the lower picture took me best part of an evening to complete. And yes I know the number is wrong but I am not going to buy a new sheet of transfers for one wagon.
I think the result is well worth the effort.