The Post Office has been test-bedded.
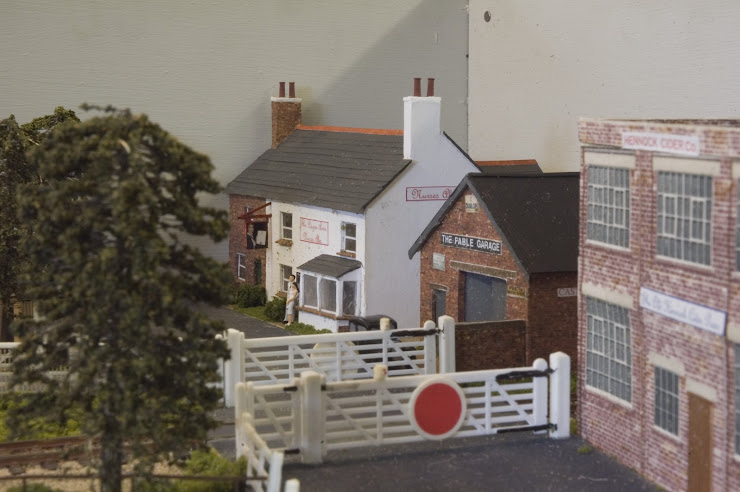
Slight discrepancy between the road surface and the walls. However, this is not too serious nd can be addressed when the building is finally in place.
Several things to do before this happens.
The road surface needs to be completed and fencing erected along the Railway Boundary.
The whole scene seems to be coming along almost as planned- now watch something go wrong!
By the way- A Very Happy Easter to you all.
Hennock

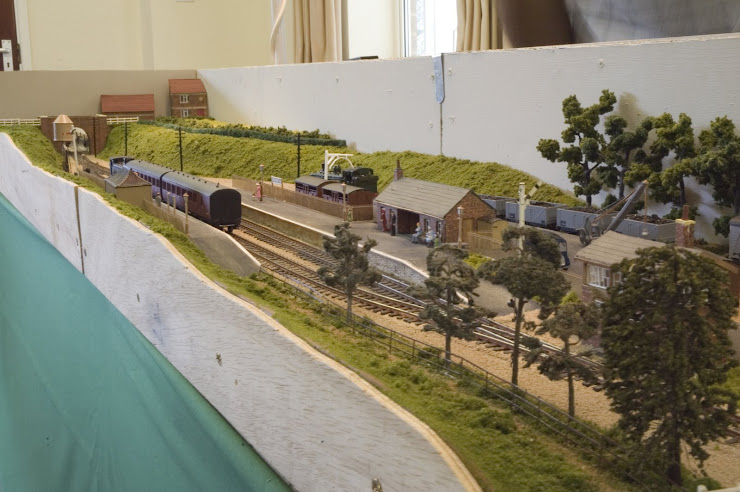
General view of Layout.The facia has since been varnished.
The Degree Inn

In recognition of my eldest Daughter's achievement. She is also the one who gave me the push to build the layout.
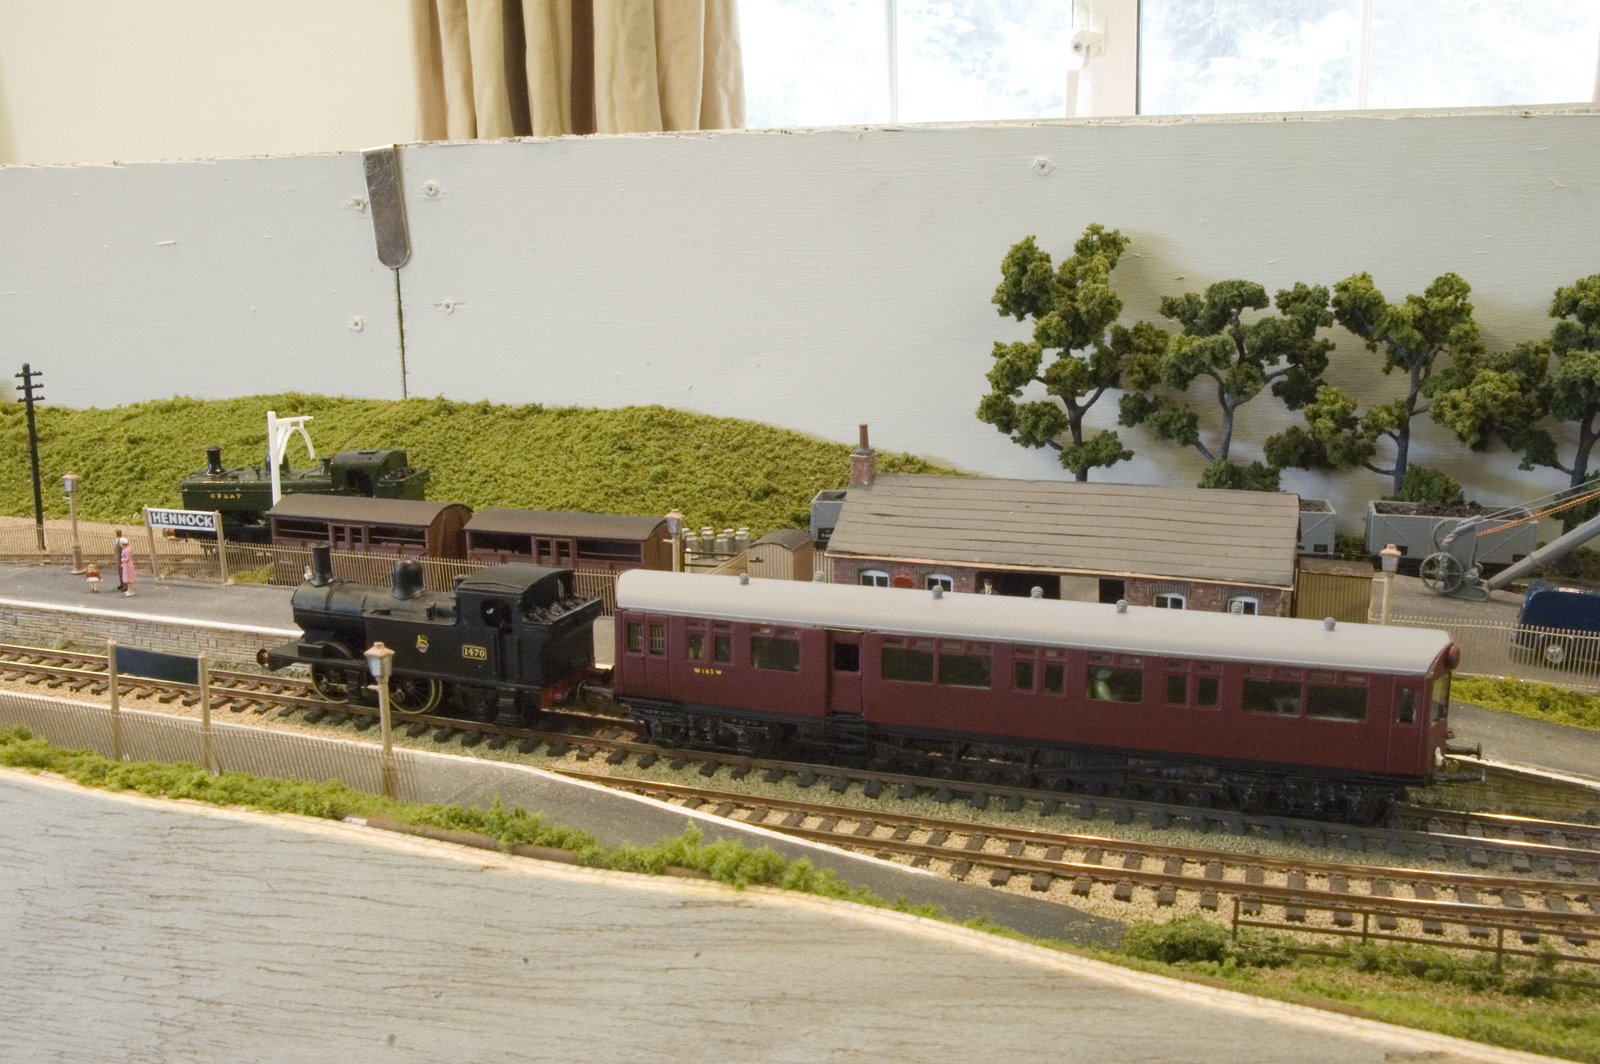
14XX and Autocoach

Shows Station building-based on Staverton.
Hennock Track Plan

Sunday, March 31, 2013
Saturday, March 30, 2013
Diversionary tactics!
Well- to be honest I got the template the wrong way up when making this building.
So- some judicious realignment of the road was necessary. the unrequired part was torn out and a new base inserted.
Strips of card have been stuck on to create the base for the bank- the same has been done on those parts not so far treated.
Quite pleased with the chimneys- just painted the black on but it looks almost 3D- strange how that happens some times.
More on Teignford.
Friday, March 29, 2013
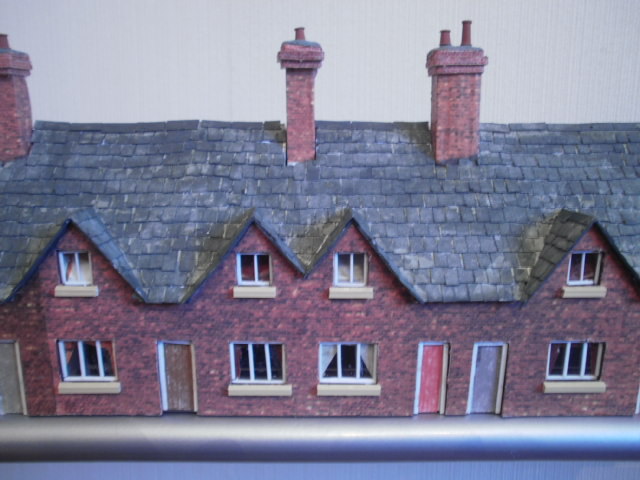
Cottages.
You must be getting tired of seemingly repetitive posts but they all show the development of Teignford.
The cottages have now been firmly installed on the second board.
The eagle eyed among you may notice some subtle changes such as drain pipes and flashing around the chimney stacks..
The join around the front walls has to be addressed, at the moment there is an unacceptble gap so the landscaper will need to get his skates on.
Thursday, March 28, 2013
Barn Completed.
This is the finished result of the re-roof.
Unfortunately the colour doesn't show the detail so well in the photo but does show the definition when using eyesight.
However, this is how it will reside in the farmyard and I am pretty well satisfied that it blends in.
Through the medium of the 3mm e-group I have the size of straw bales that are needed to occupy some of the open space so must find a way to reproduce a fair number of these.
Wednesday, March 27, 2013
Rhineside- Continental TT 1:120.
You may remember that John O'Dells excellent Continental TT -1:120 appeared at the Bournemouth Model Railway Exhibition recently. I assisted in erecting the layout and was looking forward to help operate. Unfortunate events overtook this and I had to miss the Sunday because of family illness. John regretted that I didn't have the opportunity to help operate and I took some very poor photos. By happy coincidence you can view Rhineside running if you click the link-here
Tuesday, March 26, 2013
GWR Railmotor.The real thing!
I have followed the construction of the GWR Railmotor with fascination. Not having seen it for myself, I was pleased to recieve this image from John O'Dell of the Railmotor at work on the West Somerset Railway. It had been my intention to see it running in Cornwall earlier this year but various things meant that I couldn't so I am very grateful to John.
Monday, March 25, 2013
A Painted P.O.
 | ||
The roof has had it's first coat of paint. Using Humbrol Matt 91, same as the cottages.
The PVA used for securing the tiling must have an effect on the paint as, while not as marked as the cottages, it does give a slightly mottled effect.
This suits me as it looks the part and will save a lot of messing about to make it look right.
The wall is the Javis product mentioned recently and just placed for effect.
Just the chimney pots to finalise and this is ready for being permanently planted.
Sunday, March 24, 2013
What Next?
The Post Office is virtually finished- and the modelling Facilty (posh name for this) is awaiting the next project. What will it be? I have so many things on the go it is sometimes difficult to restart them as they possibly stalled due to some problem or other.
Much work needs doing on Teignford, but this means adjourning to the loft but this will have to be soon as a few buildings need bedding in-sounds like gardening and I hate gardening!
Teignford is to be at the 3mmSociety meeting at Salisbury soon so had better crack on.
Saturday, March 23, 2013
The Village Post Office.
Plodding on with the Post Office, it has reached the stage of tiling the roof.
This time I am using 8mm wide strips cut at 4mm centres to rpoduce a 4x4 exposed tile.
The fly in the ointment is the curved corner which, as far as I can see, will have to be done with individual tiles.
One thing I must do is snap off the blade more oftem as the edges around the windows is not as crisp as I would wish.
More pics on Teignford blog in a couple of days
Friday, March 22, 2013
Javis Stone Walls- OK for 3mm?
Came across these a few days ago.
Made by Javis, they are cleanly cast in resin and have a grey painted finish.
Measuring 11mm high- scales at 3ft 8inches-these come in lengths of 75mm about 35ft in 3mm.
The base needs flattening with a file or abrasive material and to butt join them needs a small amount of fettling. Weathering would bring out more detail.
At about 60pence a length these could be a quick and economic way to provide a boundary.
They will appear on Teignford- I'm just not sure where yet!
Thursday, March 21, 2013
Re-roofing the barn.
For some time I haven't been entirely happy with the roof covering on the barn.
The later efforts of applying individual slates/tiles looks so much better.
However, I was concerned that trying to add individual slates would destroy the roof thus giving me yet more work to do.
Looking for something or other in the loft the other day, I came across a pad bought in Majorca a few years ago. Whilst of only about 70gsm paper, it did have 4mm squares printed on it- result!
Each square is cut up to the next line and is pared off in 8mm strips and adhered with a 4mm overlap. The first five courses are shown- this is a really quick way of tiling a roof- why didn't I think of it earlier? I am sure I saw it somewhere before.
Wednesday, March 20, 2013
Here we go again!
Here we go again! Oh no not another building ! Well this is the local shop/Post Office which will be on the corner of the cross roads between boards 2 and 3.
Top photo shows the rough template of the footprint and one of the sides already marked out.
The lower pictures show it all cut out and stuck together. I must confess at this point that I have made it the wrong way round- should have marked the template TOP!
Still, all is not lost because with a little bit of realigning of the lane, this will fit. This saves me having to redo the whole marking and cutting out process again.
The rounded corner has been enabled by scoring the card on the inner surface halfway through in a V shape and using UHU to glue it together. All walls have been painted matt white and the window surrounds matt black- this highlights the white window framing- no double glazing yet!
Tuesday, March 19, 2013
Fences-3mm style.
About a month ago I posted a photo of a portion of fence as an experiment. After looking at it I thought I would build the rest for the surrounding yard of The Jasmine Inn.
Here is the result before it is planted in place.
Made from my old friends the wooden stirrer, these are sliced with a sharp snap off knife blade, roughly to size. Then glued together with PVA or similar, surprisingly a very strong bond ensues.
The boarding is just roughly sliced thin card againg stuck on with the same glue.
Monday, March 18, 2013
Touching Base-3mm style!
With the majority of this build complete, time to attach to where it is going to sit.
The whole module is easier to work on rather than have it stuck to a large piece of plywood.
So the base has been made to fit its resting place so bedding in is also a lot easier. Constructed from card, the base has had some flock applied for lawn and the paved area has been painted. The flower beds have earth but still await some blooms-Mini-natur is the prefered species- to be planted (stuck on). More photos on Teignford-see left- in the next few days.
Sunday, March 17, 2013
Cottages- Again!
Chimney tops have been added- just flashing and drainpipes to add now. It's base is already made so the row can be planted and the join disguised.
Saturday, March 16, 2013
Hymek-3mm Scale.
At long last I have had the chance to motorise the resin Hymek body purchased from Bruce Smetham some time ago.
Using the Bullant motorised and trailing bogies from Hollywood foundries, fitting is simplicity itself.
Using 40 thou brass strip, the bogie centres were first marked and the holes for the bogie mounts calculated and drilled. The width had to be reduced for the motorised end to allow sufficient swing.
uprights were added to stiffen things up and the whole lot simply bolted together. Testing for fit, I think the body sits right- just wiring up and testing before the paint shop beckons.
Friday, March 15, 2013
Class 25 Diesel - 3mm Scale.
Roberts Class 25 Diesel is almost complete. Using a continental TT RTR chassis it is guaranteed excellent running.
Bodywork is from a kit which for the life of me I cannot remember which one.
Shown on Robet's fledgling layout with a hopper wagon in tow.
Bodywork is from a kit which for the life of me I cannot remember which one.
Shown on Robet's fledgling layout with a hopper wagon in tow.
Thursday, March 14, 2013
Worsley Works E147 'B' Set in 3mm Scale.
Nigel has completed the main part of the latest Worsley Works offering.
Assembled in the usual way, ends and sides soldered together, floor folded up and roof glued on this really is one of the easiest coach kits to build.
Whitemetal Battery Boxes and brake gear add to the weight, plus an interior.
Bogies are re-used from a previous coach and is nearing completion.
Assembled in the usual way, ends and sides soldered together, floor folded up and roof glued on this really is one of the easiest coach kits to build.
Whitemetal Battery Boxes and brake gear add to the weight, plus an interior.
Bogies are re-used from a previous coach and is nearing completion.
Wednesday, March 13, 2013
Killybegs- Irish Narrow Gauge in 3mm Scale.
Dave has progressed well with his rendition af Killybegs.
Shown are the carcasses of the buildings as well as the station and harbour areas.
Compromise has to be made in the form of the tunnel portal which is a bit of modellers licence. The story goes that after building work was completed , a large amount of soil and rock were left. So, the comment was-'We might as well use it- we'll build a tunnel'.
Tuesday, March 12, 2013
Dorset Group March 2013 Meeting.

The March meeting saw seven attending. No layouts this time but plenty of modelling .
Details of these will follow during the next few posts but to whet appetites for all things 3mm, a couple of pictures of Roberts Southern Queen Mary brake van .
An interior photo of the work area available- plugs are well situated so several workstations are possible.
Monday, March 11, 2013
Paint went wrong but it looks good.
Humbrol Matt 91 is the paint chosen to colour the roof of the cottages. For a Humbrol Matt paint it seemed very thin when compared to their Matt Black.
However, I persisted and this is the result.
Close up you can see that it doesn't cover as well but from a distance it looks pretty good.
I might give it a thin wash of Badab Black from Games workshop but i'm not decided yet-comments are welcomed as usual-Thanks to Neil Cherry for his kind comment.
Just the chimney tops to add plus drainpipes- not going to worry about guttering this time- no one has missed them so far-thats probably just about to change!
Sunday, March 10, 2013
Chimneys.
I have made the chimney tops separately from the stacks.
Three pieces of artists mounting card wrapped with a couple of courses of brick paper- easier to say than do- very fiddly but, I hope you agree, worth it.
The pots are 3MM Society castings, just need final cleaning up and painting then the whole lot can be glued to where they belong.
Three pieces of artists mounting card wrapped with a couple of courses of brick paper- easier to say than do- very fiddly but, I hope you agree, worth it.
The pots are 3MM Society castings, just need final cleaning up and painting then the whole lot can be glued to where they belong.
Saturday, March 09, 2013
Support your local Model Shop!
My views of the local Model Railway Shop are well known by my modelling aquaintances.
So most of my needs are aquired at shows I attend or, mostly, at 3mm Society events.
However, needing some paint, I popped into a general model supplier, mainly aircraft. Historically they stocked a small amount of Model Railway items, mostly Hornby, but couldn't make it pay.
Hiding in a cabinet was a long forgotten 16V AC plug in transformer by Hornby which will do just right for operating the Dapol signals I recently reviewed and it only cost £7!!. This will save me having to have a jump cable to transfer 16Vac across the join. Also picked up some brass strip which will do nicely for the Hymek chassis- Goes to show mail order isn't always best. In case you are interested-Channel 4 Models, Charminster Road, Bournemouth.
Friday, March 08, 2013
March 2013 Dorset Group Meeting.
A reminder that our next meeting is tomorrow Saturday 9th March 2013.
Usual meeting place-Furzebrook Village Hall, Wareham BH20 5AR. Take the sign for Blue Pool at roundabout on Swanage road and the hall is about a mile on the right hand side.
Refreshments are available as is free car parking and chat! A small charge is made for the hire of the hall.
Thursday, March 07, 2013
Yeoman Models for 3mm.

Currently on e-bay are a number of Nathans creations under the Yeomans Models heading.
Shamelessly, and with the best intentions and for no gain of my own I have uploaded images of Nathans products.
Now, I have a few of Yeomans Models products adorning Teignford but, due to my mistrust in Paypal and being unemployed, I have not purchased any of these latest offerings.
If they are as good as the K3 Telephone Box, AA & RAC Boxes, not to mention the post box then I can thoroughly recommend them.
Check out e-bay and purchase them- this may encourage Nathan to do some more.
I understand that he is open to suggestions- so contact him and
express your wishes- If you don't ask you don't get!!!
Subscribe to:
Posts (Atom)


 What next?


